Since few years I’m working in the video editing space and – as a Linux lover – I do my all edits on KDEnlive.
When I started this journey I did all of my edits on an Asus laptop running on an i3 4th gen CPU and 8GB of RAM. Not the most powerfull solution but what I was able to afford.
Few years have passed and I’m now on a 10th gen i7 HP laptop that I specifically bought thinking of taking vantage of the integrated Nvidia GPU just to realize it’s an MX250 lacking the encoders. Luckly enough the cpu sports an iGPU that can help in the encoding phase. Nether the less I still look to find a way to speed up my renderings.
Some months ago I salvaged a pc from the sidewalks and made an home server from it. It was originally an i3-4th gen with 4GB of Ram. I upgraded it to an i7-4790 that I bought on aliexpress for 40$ and added 16GB bought on aliexpress as well for 15$.
Looking at the comparison between the i7-4790 and my shiny 10510U I realized that the 4790 could be faster than the latest 10510U… mostly because of the faster clock.
I then looked at how to offload the rendering from my laptop to the server but as far as I searched, there is no tutorial or explanation. The most I found was a yotube video on how to render on a virtual server instance under proxmox but with the caveat of having to use the KdenLive GUI.
note: both my laptop and server are running Ubuntu. As of this morning the server was on 22.04.3 LTS while my laptop on 23.10
Few observation before the start:
KDEnlive can create a rendering script that can be used as input for melt. Usually this is done to create a rendering queue to be runt at a different time. This script however, can be used on any other system to render the same project.
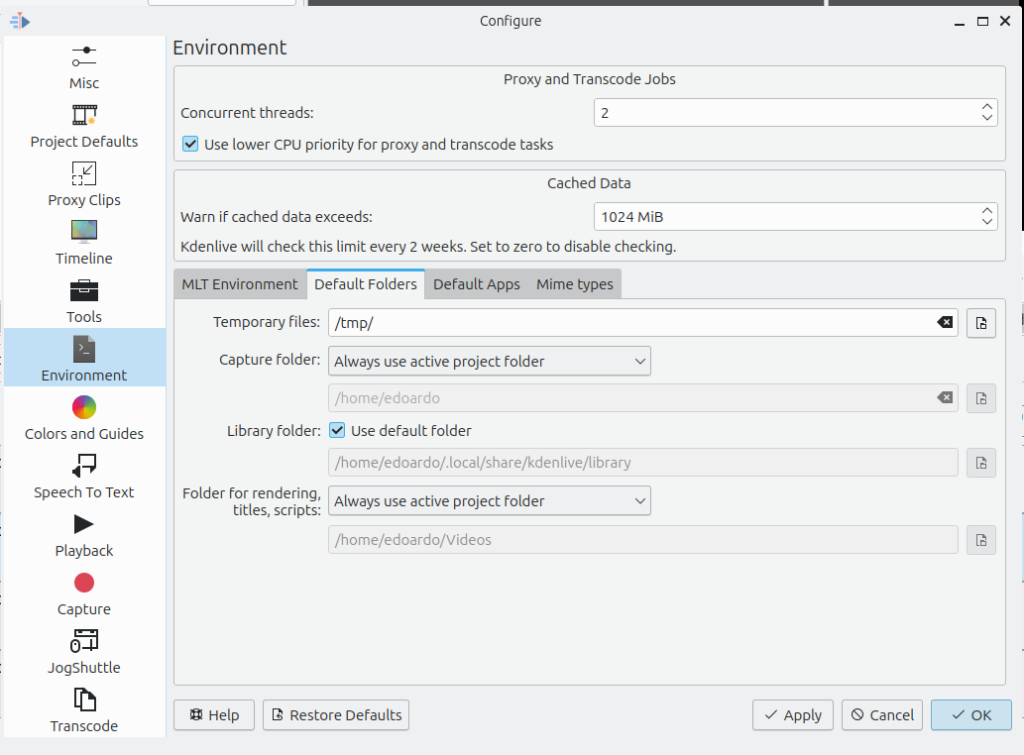
The script is saved in some folder, according to kdenlive settings: in my case in /home/edoardo/Videos/kdenlive-renderqueue
as you can see in the image below

The script reference all the parts needed for the video as absolute paths.
This means that if the project makes use of library stuff (mine does), that files are not in the same folder as the other videos/pictures/music you use in your project. you’ll need to archive your project somewhere to have all the necessary pieces in the same place.
Now, as I use my server as a NAS and a Backup, the files are already there but the path is diffent between the laptop and the server so, I created a symbolik link on the server to reflect the path on the laptop.
This step can be avoided if you edit the .mlt script to reflect the path on the rendering pc.
So, I ended having a script and all the element alligned between the 2 systems. Than I tried to run the rendering with a simple command over the cli
melt renderingscript.mlt
That didn’t go well. Leaving apart errors in the script himself, melt was complaining about running on an headless system with no Desktop Enviroment because the process is based on QT libraries that are relying on the DE. The solution is to install xvfb, a wrapper to “simulate” the presence of a DE.
Still not working, so I tried installing kdenlive and that made the things slightly better, still no success but less errors. Than I realized my version of Ubuntu server was not updated and the kdenlive version very outdated… Ok, let’s update ubuntu to the next LTS (23.04)…
About half an hour later Ubuntu was updated and KdenLive as well, still not the latest release but not the oldest as before. That made the trick.
The rendering script is now working and the render is completing.
I runt a couple of test with a project of mine of a short video of about 2 minutes with different transitions, transformations and overlays. The final video is a vertical Full HD 30fps.
The server (no gpu involved), renderd it in 1:22
The laptop (no gpu involved), rendered it in 1:43
the laptop (with the igpu), rendered it in 1:23
so, the server is actually faster than my laptop (sigh…) but the igpu saves the day.
So, long story short, if you want to offload your rendering:
1. update the rendering machine to the same OS/version
2. install a Deskop Enviroment or at least xvfb
3. install kdenlive
4. archive your project
5. create the script
6. edit the script to fit the path if you are storing the files in a different path
7. run melt on the .mlt file created by kdenlive
8. enjoy your video
p.s. the rendering can be over the GPU, integrated or discreet, assuming you have one on your rendering machine even if you don’t on the editing one, as far as you save the script selecting the correct rendering profile.